![]() It’s Time to bolt!
It’s Time to bolt!
Oh, the Wells Fargo Wagon is a-comin’ down the street,
Oh please let it be for me!
Oh the Wells Fargo Wagon is a-comin’ down the street,
I wish, I wish I knew what it could be!
This article originally appeared in my earlier blog site, on September 23rd of 2012.
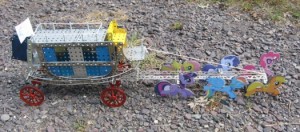
Greetings! This article features my first use of three unique Erector parts: the P17 spoke wheels, the OF press-board carousel horses, and the A48 clockwork motor. The model in question is a Well-Fargo Stagecoach, another iconic symbol of the Old West.
The Wells-Fargo stagecoach has figured prominently in many stories, and I doubt one could watch a Western movie without seeing at least one. The Wells-Fargo company used these coaches to transport people and goods all over the western territories, in the days before railroads connected the various settlements. The exploits of these coaches has been highly romanticized, along with many elements of the Old West. But one thing is true: they were frequently targeted by various types of bandits, so to combat this they tended to have large teams of horses. In the more developed areas, a team of two horses could easily pull a fully laden coach. But when on the open range, they usually had teams of four or six horses to provide extra speed. The hope was that if bandits did show up, the coach could simply outrun them. And if that didn’t work, well, the expression “riding shotgun” dates back to the stagecoach crews. Typically two men would operate a given coach. One would control the horses, while the other – typically a carpenter or mechanic who maintained the coach when it wasn’t on the road – would sit beside him with a loaded twelve gauge. Just in case one of those bandits got a little too close.
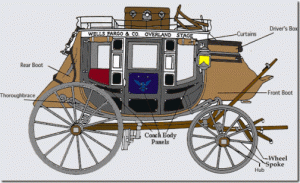
This image is what I used as a model; total construction time was about four hours. Notice that the base of the carriage is slightly curved, and is only connected to the chassis by leather straps and impact springs. This actually made a ride in one of these things fairly tolerable. The most common mode of transportation in the old west was the Conestoga wagon, which is essentially a large, rigid wagon attached to a horse team. Riding a Conestoga was an uncomfortable ride at best. Riding in a Stagecoach would have been the equivalent of first-class travel!
The body of the coach was a mix a class-II and class-III girders spaced by double angle brackets. Various types of base plates were used to create the walls, roof, and driver seat. Two Hillman company mending strips were used to round out the rear boot, though I suspect a pair of class-III 9-hole perforated girders would have worked just as well. The chassis are a simple I-frame design made from 10 inch “C” girders and double angle brackets, with car-trucks for wheel trunions. The throughbrace was made with curved “E” girders and short “A” girders, and is attached to the chassis by “O” pawl connectors. Like it’s historical analogue, the cabin itself rests on the chassis and is only attached to the throughbrace with springs. The Hillman strips and the springs are the only parts I used that are not standard Erector parts.
I was quite pleased at how well this turned out. My wife said it was “too cute for words.”
Neither rain nor sleet nor lack of friendship…
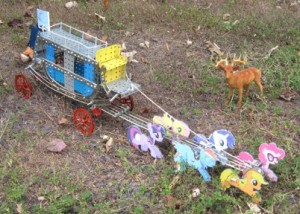
The horses are clearly custom made, but the dimensions of the “Little Ponies” are the same as the standard Erector OF carousel horse. In fact, I originally made these customized ponies in anticipation of building a version of the famous Erector carousel. But, this Wells-Fargo stagecoach wouldn’t wait, so the intrepid pastel ponies made their debut with this model instead.
Lindy Week, over at Jitterbuzz.com, has several useful tips on the restoration of Erector sets, and he provides instructions on how to fabricate the OF carousel horse using press-board and photographic paper. I used the procedure he describes in the construction of both the customized ponies, and four official horses. A deviantart.com user named General Zoi created an excellent “paper doll” program for My Little Pony images, and I used this program to replicate the ponies from the popular children’s show. (My daughter is a big fan.) The GIMP graphics manipulation program was used to scale and position the ponies into a position that conformed to the official OF position. I was quite pleased with the results.
I must say that your classic-style carousel attire is simply fabulous!
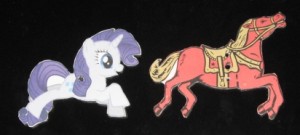
Well thank you kindly, ma’me!
I’ve grown quite fond of the P17 wheels from the class-I era. They have a lot of character! And for this model, they were perfect. The only thing that would have made them work better would be if they came in two sizes! At any rate, the open spokes went a long way in re-creating the old-fashioned look of the classic stagecoach. Had I not had these wheel available, I’m not sure I would have tried this model. The open spokes are so much a part of the old stagecoach look that any other type of wheel wouldn’t have looked right.
Finally, this was the first time I had built a model with the A48 clockwork motor. This old motor was featured in several Erector sets from the 1930’s and 1940’s, especially the smaller ones, and is suitable for light loads. I mounted the motor on the back of the carriage, and connected it to the back wheels using a rubber band and a pulley. The model doesn’t move very fast or far, as the video below shows, but it does give the model a certain unique charm. I suspect the collective weight of the model is a bit much for the wind-up motor to handle with any efficiency, but it does do the job.
I brought this model with me to a regional meeting of the A.C. Gilbert Heritage Society in northern Maryland, back in November of 2012. It was also featured on the online fanzine for My Little Pony, Equestria Daily. The model was broken down in December of 2012 and the Erector Set put aside, to make room for the Christmas tree.
