

The summer of 2015 saw a very different approach than the previous year. First off, I built a proper raised box. I learned from the previous year that having the box flush to the ground is asking for trouble. It is too easy for the local weeds to get in and cause trouble. However, most of the weeds I encountered tended to be low to the ground, so I figured the box wouldn’t have to be very high to keep out invaders. I estimated that having the base about eight inches above the ground, when combined with the natural walls of the box, would keep most weeds at bay.
I also chose a different location where the ground was dryer and less prone to weeds. The disadvantage of the new site was that it didn’t get quite as much sun (though it still received a respectable amount) and was a fair distance from the house. Once I had the space blocked out, I set out to build the first box. I found a design for a raised, square-foot garden box at the Orange County Extension of the University of Florida, and adapted it for my own use. I did away with some of the bling, like the corner caps and top ledges. I also chose not to add legs, opting instead to rest the box on a quartet of cinder blocks. This would make it easier to move the boxes later, if necessary. I figured I could add legs to future boxes, should I choose.
I also wanted to address the issue of irrigation. I suspect the previous year’s heat wave dried out my soil, which prevented some of the seeds from germinating. I kept the top layer of soil moist, but I believe the lower levels dried out. Or, whatever moisture the soil retained was being leached away by the ground below. Again, that cardboard liner proved ineffective.

To counter this, I decided to try using an olla to keep the soil moist. The olla is a very ancient method of irrigation, dating back to ancient Babylon, and it is still used in many parts of the world. It uses a clay jar with a stopper, which is buried within the soil, leaving only the neck visible. The jar is then filled with water, which leaches through the porous clay, and into the soil. I’m hoping that in the event of another heat wave, the olla could keep much of the soil moist, even if the top layer turns to rock.
Finally, for controlling wildlife, I planned to construct a PVC structure that would hold a moveable fence made from wildlife netting. The netting would go on all four sides of the box, but not the top. The structure would be lifted away from the garden when I was working on it, and returned when I was finished. This would prevent animals from approaching the boxes from the side, but not stop birds and pollinating insects from visiting.
In my experience, birds are not a serious threat to a vegetable garden. They sometimes visit, perhaps hoping to find food, but after resting their wings for a moment, they move on. If birds are picking around at your plants, then there is probably an insect infestation going on, and the birds are the least of your concerns!
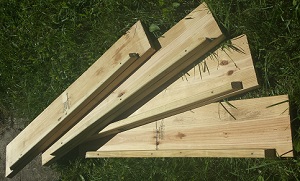
The box uses a very simple design. Untreated planks of lumber, two by ten inches, formed the walls of the box. A layer of outdoor grade plywood (OSB) forms the floor. Four balusters were attached to the walls to hold up the plywood floor. Heavy grade wood screws, driven by a standard drill, were used to join everything together.
Box walls, after attaching balusters.
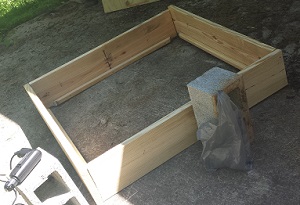
Connecting the walls.

Connecting the floor to the balusters.
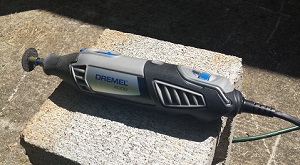
When connecting the balusters to the walls, and the floor to the balusters, the wooden screws often came out the other side!

OUCH!
These dangerous little spikes were cut off using a Dremel tool.
The carpentry phase of construction took roughly an hour. Once the box was constructed, it was moved into position and placed on a quartet of cinder blocks. Weeding mesh was affixed to the floor of the box with finishing nails, more as a means of keeping moisture in the box than as a means of thwarting weeds. Once the mesh was in place, I let the box sit for one day to “settle.”
The next day I filled it with a home made batch of Mel’s mix, used green gardening twine to mark off the grid, and got down to business.
This garden did quite well. By June I had added a second box and planted some hot-weather crops. Over the course of the summer, I harvested many Roma tomatoes, countless green beans (both bush and pole variety), some cucumbers, a bunch of snap peas, and several cloves of okra!

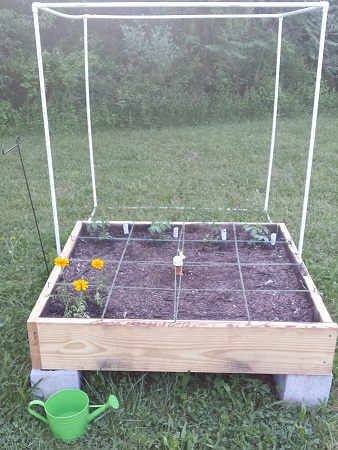
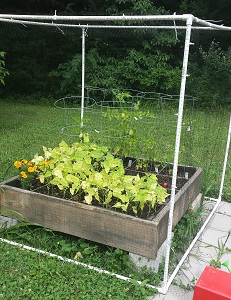
The first box, in July of 2015, with Roma tomatoes, cucumbers, and a large yield of bush green beans.
In the above photo one can see the PVC wildlife cage. It was close to five feet on a side, so it was large enough to encircle the entire box. It was also very light. I was able to lift it off the garden like a flip-top box cover when working on the garden, then put it back when I was finished. I had no problems with animals this time around. I made a similar cage for the second box.
Another view of the first box with the PVC wildlife cage. My daughter’s marigolds are peeking out from behind the bush beans.
I experimented with two varieties of squash, which were planted in the second box. The zucchini squash grew a modest vine, but never bore fruit. My spaghetti squash made one fruit that looked promising, but was ultimately undersized. Here again, I learned a lot, and decided to apply it the following year.

The second box, with pole beans, okra, and two types of squash.

Another view of the second box, earlier in the season. The pole beans made good use of those bamboo poles. A very active okra plant is in the lower left square. The other okra plants didn’t survive, but this one ran strong, well into October. If you look carefully, you can see the stopper for one of the ollas between the two pepper plants in the front row.
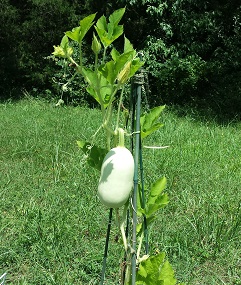
The spaghetti squash that wasn’t. This is about half the size of an edible one, and it never got beyond this size. I suspect the plant needed a larger square.
Oddly enough, I still couldn’t get any leafy vegetables or radishes. I tried three varieties of lettuce over the course of the summer, but none of them took. Even shard, which is supposed to be one of the hardiest leafy vegetables in the produce section, wouldn’t take. I found this puzzling, given that I took extra care to make sure the lettuce plants got extra water and periods of shade.
As for the radishes, I’m stumped. I thought those little crunchies could grow anywhere! I wonder what I’m doing wrong…